
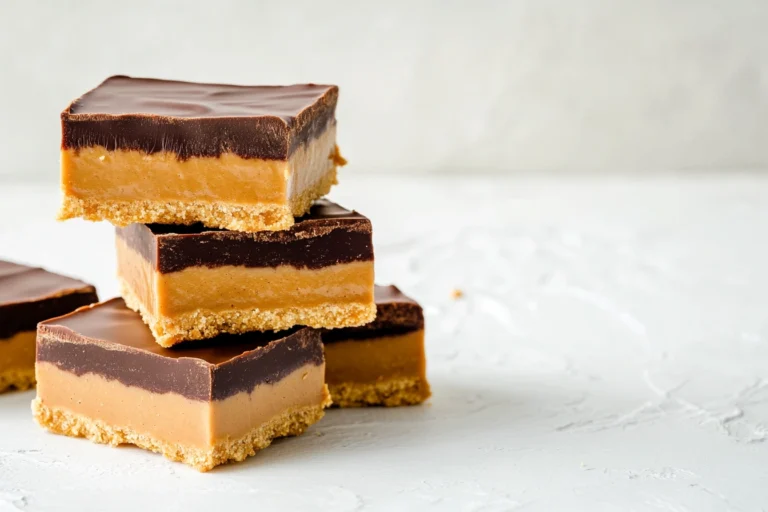
Hello, fellow dessert fans! I’m Goldie, and I have a sweet spot for simple treats that deliver big flavor. Today, I’m excited to share a foolproof recipe for Easy No Bake Peanut Butter Squares, a dessert that checks all the right boxes. If you love creamy peanut butter and a touch of rich chocolate, keep reading. This guide will cover why these squares belong in your kitchen, the best way to prepare them, and how to make them truly your own.
Why Choose These Easy No Bake Peanut Butter Squares?
You might be wondering: what makes these squares so special? First, they’re incredibly convenient. You don’t need to preheat an oven or worry about baking times. If you’re a beginner or just short on time, this recipe guarantees success. Second, they capture the classic flavor duo of peanut butter and chocolate—a combination that never fails to please. Third, they’re wonderfully adaptable, letting you tweak textures, sweetness, and toppings to match your preferences.
Furthermore, they’re perfect for year-round gatherings, including birthday parties, potlucks, bake sales, or last-minute get-togethers. Instead of sweating over an oven, you can focus on spending time with family and friends. In short, these squares are as friendly and approachable as desserts come.
My Personal Story with Peanut Butter Squares
I first encountered these easy no bake peanut butter squares when I was about ten years old. My grandmother, a wizard in the kitchen, was never short on ways to keep me occupied and excited about cooking. She would pull out a bag of graham crackers, a jar of peanut butter, and an assortment of chocolate, then show me how to combine them into a mouthwatering treat.
Each time I pressed the peanut butter mixture into the pan, I felt an immense sense of accomplishment. My grandmother always encouraged me, saying, “That’s perfect, Goldie! You’re doing great.” When we spread the melted chocolate on top, I could hardly wait for it to set. The delicious aroma was irresistible.
Decades later, I’m passing on that happy memory to you. My love for easy no bake peanut butter squares has evolved into a reliable recipe that I return to for every celebration. Whether I’m hosting a big family reunion or just craving something sweet on a Tuesday, these squares deliver memories and comfort in every bite
Ingredients You’ll Need
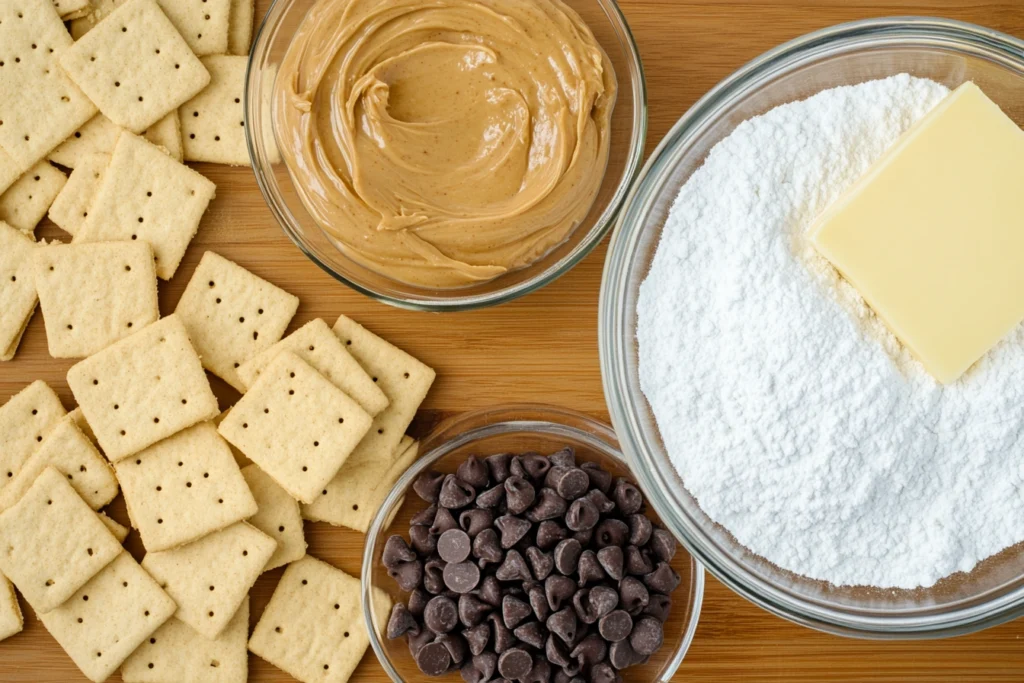
Before we dive into the step-by-step instructions, let’s review the core ingredients. The list is concise, making it simple to gather everything you need.
- Graham Crackers
- Crushed into fine crumbs. They form the base of the squares and add a gentle sweetness.
- Creamy Peanut Butter
- A smooth peanut butter blends easily with the other ingredients. If you prefer more texture, go for a crunchy variety.
- Unsalted Butter
- Melted butter helps bind the crust. If you only have salted butter, reduce any added salt in the recipe.
- Powdered Sugar
- Also known as confectioners’ sugar, this dissolves quickly and gives the peanut butter layer a silky texture.
- Vanilla Extract
- A splash of vanilla adds a subtle floral sweetness that complements peanut butter and chocolate.
- Chocolate Chips
- You can use semisweet, milk, or dark chocolate chips. Each style delivers a slightly different flavor profile.
- A Bit More Peanut Butter or Butter
- Stirring a spoonful of peanut butter or a pat of butter into your melted chocolate helps it spread evenly without cracking.
Step-by-Step Instructions
1. Prepare Your Pan
Select either an 8×8-inch or 9×13-inch baking pan. If you use the smaller size, your squares will be thicker. Line your pan with parchment paper or aluminum foil for effortless removal later. If you want to skip parchment, be sure to grease the pan lightly with butter or cooking spray.
2. Crush the Graham Crackers
Take about one sleeve of graham crackers (or the amount needed to yield approximately 1½ cups of crumbs). Seal them in a plastic bag, then crush them with a rolling pin. If you have a food processor, pulse them until you achieve fine crumbs. Avoid large chunks that might cause uneven layers.
3. Mix the Peanut Butter Base
In a mixing bowl, combine:
- 1 cup of creamy peanut butter
- ½ cup melted unsalted butter
- 1 cup powdered sugar
Stir well until you see a thick, cohesive mixture. If you like a sweeter dessert, you may add an extra ¼ cup of powdered sugar. Next, blend in the crushed graham crackers. The end result should resemble a dense dough.
4. Press into the Pan
Transfer your peanut butter–graham cracker mixture into the lined pan. Use a spatula or the back of a spoon to flatten and smooth the surface. Press firmly so everything binds well. Place the pan in the refrigerator for about 15 minutes to give the bottom layer a head start on setting.
5. Melt the Chocolate
In a microwave-safe bowl, combine 1 cup of chocolate chips (semisweet, milk, or dark) with 1 tablespoon of peanut butter or 1 tablespoon of butter. Heat in 30-second intervals, stirring each time, until the chocolate looks smooth and glossy. You can also use a double boiler on the stove if you prefer to keep a closer eye on the process.
6. Top the Peanut Butter Layer
Remove the pan from the fridge and pour the melted chocolate mixture over the peanut butter layer. Tilt the pan gently to cover every corner, or use a clean spatula to spread the chocolate evenly. This top layer will harden into a delicious shell that pairs perfectly with the creamy base.
7. Chill Thoroughly
Return the pan to the refrigerator for at least one hour. This final chill allows the chocolate to set and the peanut butter mixture to firm up. If you’re short on time, you can use the freezer for around 30 minutes. Just be sure not to leave it in so long that the chocolate cracks when slicing.
8. Slice and Serve
Once the squares are fully set, lift the block out using the parchment or foil. Place it on a cutting board and slice into uniform squares. For clean edges, warm your knife under hot water and wipe it between cuts. Serve immediately, or store your easy no bake peanut butter squares in an airtight container.
Tips for Success
- Check the Consistency
If the peanut butter layer feels too soft, add more graham cracker crumbs. If it seems crumbly, incorporate a small splash of melted butter. You want a dough-like texture that presses neatly into the pan. - Taste Before Chilling
The beauty of no-bake recipes is that you can sample the mixture before it sets. If you crave more sweetness, add a tablespoon or two of powdered sugar. If you prefer a stronger peanut flavor, add a spoonful of peanut butter. - Room Temperature Peanut Butter
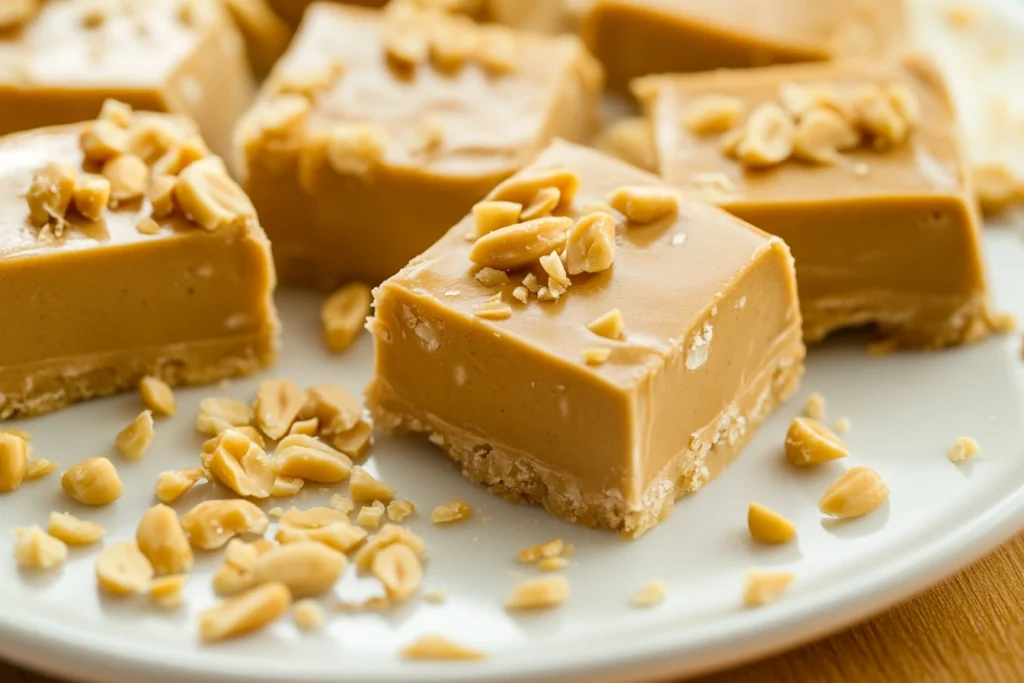
Cold peanut butter can be tough to blend, so let it sit at room temperature for a little while. This step avoids lumps and makes stirring much easier. - Adjust Your Toppings
The chocolate layer is delicious on its own, but adding chopped peanuts or flaky sea salt can elevate the flavor. Don’t be afraid to experiment. - Storage
Keep the squares in a sealed container in the refrigerator for up to one week. During hot summer months, the chocolate layer might soften if left at room temperature for too long.
Variations to Try
One of the best parts of making easy no bake peanut butter squares is the freedom to tailor them to your taste. Here are a few variations to inspire your creativity:
- Crunchy Mix-Ins
Stir rice cereal or chopped nuts into the peanut butter layer for extra crunch. Almonds, peanuts, or cashews work nicely. - Pretzel Bottom
If you prefer a salty kick, substitute half of your graham cracker crumbs with crushed pretzels. You’ll create a sweet-salty balance that’s irresistible. - White Chocolate Drizzle
Melt a handful of white chocolate chips and drizzle them over the dark chocolate layer before chilling. You can even use a toothpick to swirl it around, adding a stylish pattern. - Layered Cheesecake Twist
Whip softened cream cheese with a little powdered sugar and spread a thin layer on top of the peanut butter base before adding the chocolate layer. It’s a luxurious spin on the original recipe. - Oreo Crust
Swap the graham crackers for crushed Oreos. This doubles the chocolate presence and turns the squares into a black-and-tan dessert experience.
FAQs
Absolutely! Just make sure to stir it well to incorporate the separated oils. The squares may turn out slightly softer, but they’ll still be delicious.
Replace the butter with a plant-based alternative. Use vegan chocolate chips, and confirm that your graham crackers are dairy-free. The method remains identical.
They are. Once the squares have fully set, wrap them tightly in plastic wrap or seal them in a freezer-safe container. Thaw them in the refrigerator for a few hours before serving.
Yes. If you prefer a less sweet treat, start with half the powdered sugar called for in the recipe and adjust to taste. Keep in mind that the texture might be slightly different.
They’ll hold up fine in cooler climates or air-conditioned spaces for a short period. In warmer temperatures, the chocolate can soften or melt, so keep them chilled as long as possible.
Serving Suggestions
When your easy no bake peanut butter squares are ready, consider presenting them in fun ways:
- On a Dessert Platter: Arrange the squares alongside brownies, cookies, or mini tarts for a diverse dessert spread.
- Paired with Coffee: Peanut butter and chocolate offer a lovely contrast to a strong espresso or coffee beverage.
- In a Box as a Gift: Wrap a small selection of squares in parchment, place them in a decorative box, and share them with neighbors or friends.
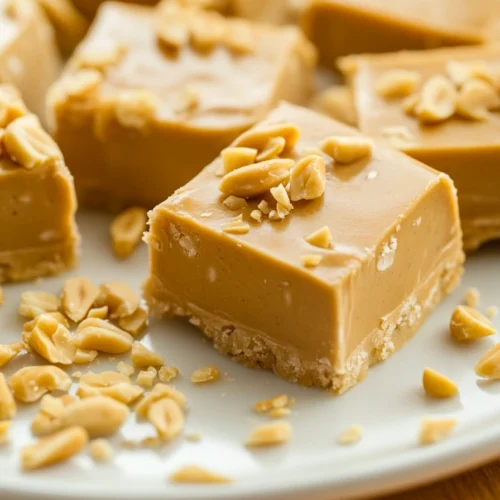
For special occasions, garnish each square with chopped peanuts, a drizzle of caramel, or a few colorful sprinkles. A small decorative topper can also add a festive touch.
Extra Reflections on This Recipe’s Charm
No-bake desserts have a unique charm. They’re accessible to both novice cooks and experts seeking convenience. Easy no bake peanut butter squares are especially gratifying because they combine nostalgic flavors into a modern, streamlined format. Every time I eat one, I recall the gentle hum of my grandmother’s old refrigerator as we waited for the squares to firm up.
I also love that these squares encourage experimentation. With a flexible recipe like this, you can embrace your inner artist and try new flavors without risking a kitchen disaster. Even if you mess up, you often end up with something sweet and edible. That’s the beauty of no-bake creations!
Final Thoughts
I hope this comprehensive guide on easy no bake peanut butter squares brings a touch of sweetness to your day. Whether you’re a peanut butter purist or a chocolate connoisseur, these squares never disappoint. They’re perfect for busy weeknights, lazy weekends, or any celebration that calls for a delightful dessert.
Feel free to explore the variations mentioned above and make them your own. Once you’ve made a batch or two, you might discover new methods to personalize the recipe. Don’t be afraid to play with flavors, shapes, or decorative techniques. After all, the kitchen is a space for creativity and fun.
Thank you for stopping by! I’m always thrilled to share timeless recipes that anyone can master. If you try these squares, let me know how they turn out. Your comments and feedback help me refine recipes so more people can enjoy them. Spread the love, share the recipe with friends, and most importantly, savor every sweet and crumbly bite.
Happy no-baking from Goldie!
Easy No Bake Peanut Butter Squares
Ingredients
- 1 ½ cups graham cracker crumbs finely crushed
- 1 cup creamy peanut butter or crunchy for added texture
- ½ cup unsalted butter, melted
- 1 cup powdered sugar can be adjusted to taste
- 1 teaspoon vanilla extract
- 1 cup chocolate chips semisweet, milk, or dark
- 1 tablespoon peanut butter or butter for smoother chocolate topping
Instructions
- Line an 8×8-inch or 9×13-inch baking pan with parchment paper or aluminum foil for easy removal.
- Crush graham crackers into fine crumbs using a rolling pin or food processor.
- In a mixing bowl, combine peanut butter, melted butter, powdered sugar, and vanilla extract. Stir until smooth.
- Mix in the crushed graham cracker crumbs until the mixture resembles a thick dough.
- Press the peanut butter mixture evenly into the lined baking pan, smoothing the surface with a spatula.
- Refrigerate for 15 minutes to allow the base to set.
- Melt the chocolate chips with the peanut butter (or butter) in the microwave in 30-second intervals, stirring each time, until smooth.
- Pour the melted chocolate mixture over the peanut butter base and spread evenly.
- Chill in the refrigerator for at least 1 hour (or 30 minutes in the freezer) until the chocolate is firm.
- Lift the chilled mixture from the pan using the parchment paper, place on a cutting board, and slice into squares.
- Serve immediately or store in an airtight container in the refrigerator.