Creating clouds for cakes is a delightful way to add whimsy and charm to your baking. Whether you’re designing a rainbow-themed cake or adding a sky-inspired touch, learning how do you make clouds for a cake is easier than it seems. In this guide, we’ll explore edible and decorative methods, tools, and tips to make your cake designs soar. From fondant techniques to cotton candy clouds, you’ll gain a treasure trove of ideas to bring your cake-decorating vision to life.
Let’s start by understanding the basics and why clouds make such a fantastic addition to cakes.
Introduction to Cake Clouds
What Are Cake Clouds?
Cake clouds are light, fluffy decorations designed to resemble real clouds. They’re often used to enhance cakes for birthdays, weddings, and special occasions. These versatile decorations can be crafted from fondant, buttercream, whipped cream, or even non-edible materials like cotton candy for a dramatic effect.
The beauty of cake clouds lies in their adaptability. Whether you want a dreamy, pastel aesthetic or bold, dynamic shapes, they add a unique touch that elevates your cake to a showstopper.
Why Use Clouds in Cake Decorating?
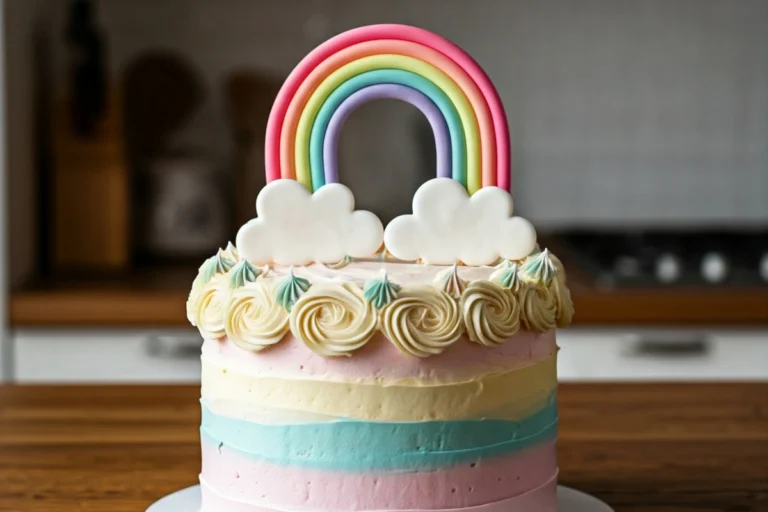
Adding clouds to a cake isn’t just about aesthetics—it’s about storytelling. Clouds symbolize dreams, wonder, and serenity, making them perfect for various themes. Think of a rainbow cake, where fluffy white clouds cradle vibrant colors, or a nighttime sky design adorned with stars and moons.
Not to mention, clouds create depth and dimension, transforming a flat cake into an artistic masterpiece. If you’re wondering how do you make clouds for a cake, you’ll be pleased to learn there are options for every skill level, from simple buttercream puffs to intricate fondant designs.
Types of Cake Clouds: Edible and Decorative
Cake clouds come in two main types: edible and decorative. Edible clouds are made from materials like whipped cream or sugar paste, ensuring they’re safe to eat. On the other hand, decorative clouds can be crafted from materials like cotton candy or rice paper, offering dramatic visual appeal.
Materials and Tools for Making Cake Clouds
Essential Tools for Cake Cloud Creations
When exploring how do you make clouds for a cake, having the right tools is crucial. Start with basic equipment like rolling pins for fondant, piping bags with round tips for whipped cream, and offset spatulas for smooth application. A fondant smoother can be helpful if you’re aiming for flawless edges on your decorative clouds.
For more intricate designs, consider investing in stencils for airbrushing or cloud-shaped cutters to create uniform shapes. These tools not only make the process easier but also ensure your cake looks polished and professional.
Ingredients Needed for Edible Clouds
Edible clouds require simple, accessible ingredients. For whipped cream clouds, heavy cream, powdered sugar, and vanilla extract are must-haves. Fondant clouds need ready-made fondant or a homemade alternative made from marshmallows and powdered sugar. If you’re feeling adventurous, try making clouds using isomalt for a translucent effect.
For cloud decorations that stand out, edible glitter or a touch of food-safe luster dust can add a magical glow. These small details elevate your design, making your clouds visually appealing and delicious.
Non-Edible Decorative Cloud Options
Not all clouds need to be edible. Non-edible options like cotton candy, rice paper, or even foam inserts can provide dramatic and realistic results. These are especially handy for display cakes or events where the focus is more on presentation than edibility.

For a comprehensive cake-decorating guide, check out this cloud cake recipe for additional inspiration and tips.
Techniques for Creating Edible Cake Clouds
Using Fondant to Craft Clouds
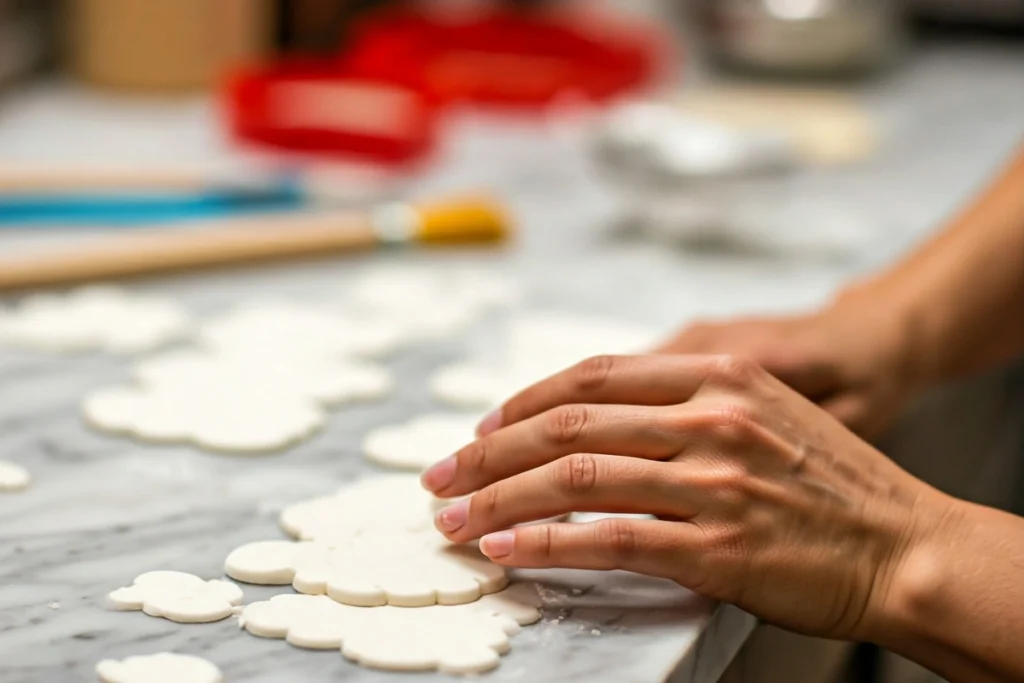
Fondant is one of the most versatile materials for creating cake clouds. To start, roll out white fondant to about a quarter-inch thickness. Using cloud-shaped cutters or freehanding with a knife, cut out cloud shapes of varying sizes. To add dimension, layer smaller clouds on top of larger ones.
Enhance your clouds with a dusting of edible shimmer powder or by gently airbrushing the edges with blue or silver for a realistic effect.
Making Clouds with Whipped Cream or Buttercream
If you prefer softer textures, whipped cream or buttercream is a fantastic option. Fill a piping bag fitted with a round tip and pipe small mounds onto your cake, layering them for a fluffy, cloud-like appearance.
For a more stable design, you can use Swiss meringue buttercream, which holds its shape better than regular whipped cream. Add a touch of food coloring for pastel or gradient effects to match your cake’s theme.
Pastillage and Isomalt: Advanced Techniques
For experienced bakers, materials like pastillage or isomalt can create striking, sculptural clouds. Pastillage, a sugar-based dough, hardens quickly and is ideal for 3D shapes. Shape the dough into clouds while it’s pliable, then let it dry for a sturdy, decorative element.
Isomalt offers a glass-like finish, perfect for translucent cloud designs. Heat the isomalt until it melts, then pour it into molds or shape it freehand. Once cooled, it creates delicate, airy clouds that sparkle under light.
By combining techniques and materials, you can achieve stunning edible clouds that wow any audience. Ready to elevate your decorating skills? Keep reading to discover non-edible cloud techniques that are just as impressive!
Techniques for Non-Edible Cake Clouds
Cotton Candy as a Decorative Cloud
Cotton candy is a simple yet striking way to create fluffy clouds for cakes. Its light, airy texture closely resembles real clouds, and its subtle sweetness complements many cake flavors. To use cotton candy as a decoration, carefully shape it into cloud-like forms just before serving to prevent it from melting. You can even add edible glitter or small fondant stars for extra flair.
Crafting Clouds with Rice Paper or Gelatin
Rice paper and gelatin are excellent non-edible materials for creating realistic clouds. For rice paper clouds, soak the sheets briefly in water, then mold them into rounded shapes. Let them dry until firm, and paint the edges with edible shimmer dust to add depth.
Gelatin offers another creative option. Dissolve gelatin in water, spread it thinly on a baking sheet, and allow it to set. Once dried, cut it into cloud shapes or use it to create translucent, wispy effects. These materials are especially useful for display cakes or intricate designs.
Using Stencils and Airbrushing for Cloud Effects
If you’re wondering how do you make clouds for a cake without physically adding cloud-like shapes, stencils and airbrushing are perfect solutions. Place a cloud stencil over your cake and gently airbrush white or light blue food coloring to create a dreamy effect. This method works well for covering large surfaces and pairs beautifully with themed decorations like rainbows or hot air balloons.
Looking for more creative cake ideas? Browse through this guide to cloud cakes for inspiration.
Designing Cakes with Clouds
Incorporating Clouds in Theme Cakes
Clouds are a versatile addition to many cake themes. For a whimsical touch, pair them with rainbows or flying planes on a baby shower cake. Sky-themed wedding cakes often feature delicate fondant clouds as a backdrop for elegant floral arrangements or metallic accents. No matter the occasion, clouds enhance the theme with charm and softness.
Combining Clouds with Other Decorations
When adding clouds to a cake, balance is key. Combine them with elements like edible flowers, sugar figurines, or fondant animals to create a cohesive design. For example, fluffy clouds can cradle a fondant unicorn or serve as the base for a cascading waterfall effect. These combinations make the clouds a focal point while harmonizing with the overall design.
Popular Cloud Cake Ideas and Inspiration
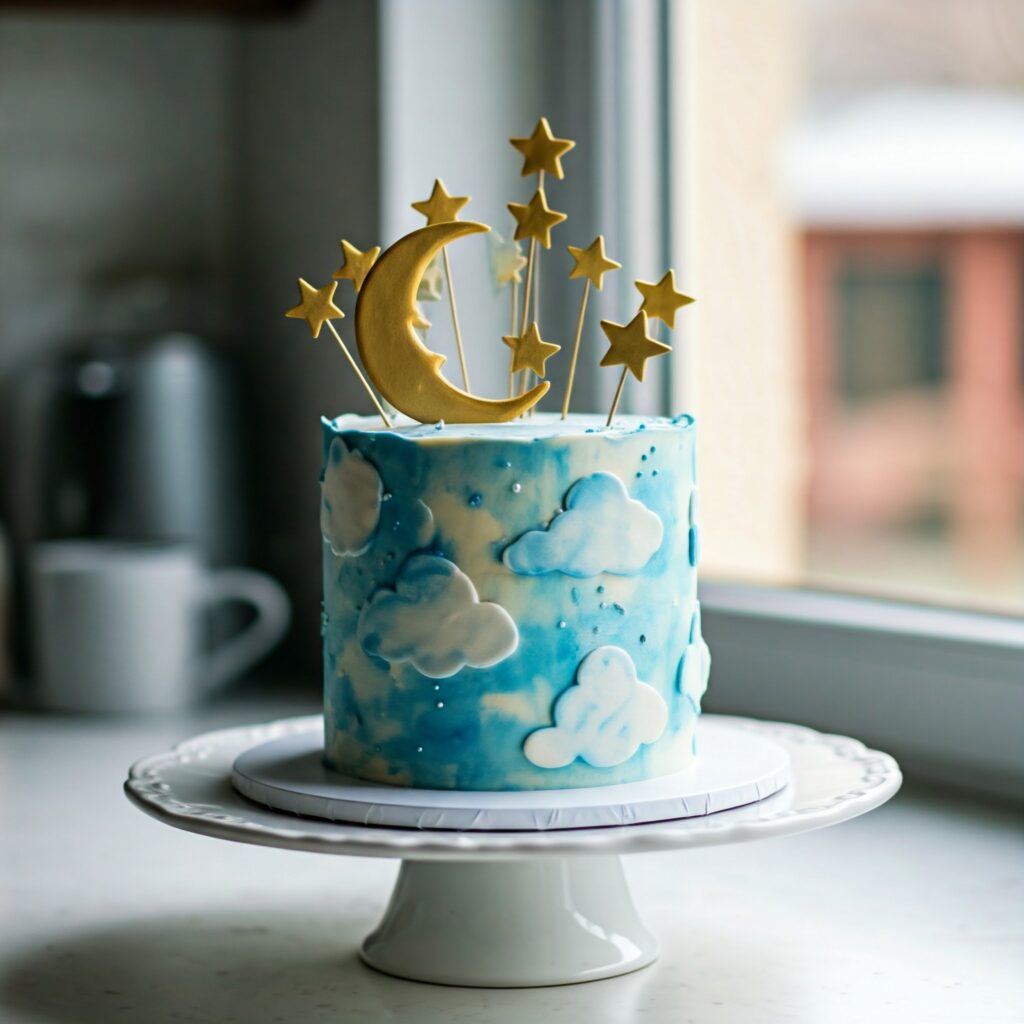
Looking for specific ideas? Consider a hot air balloon cake where fondant clouds surround a 3D balloon topper. Another favorite is a celestial cake featuring airbrushed clouds, gold stars, and a shimmering moon. For kids’ parties, clouds paired with cartoon characters or fantasy creatures can bring smiles all around.
If you’re eager to explore more unique designs, check out our collection of decorating tips and ideas to spark your creativity!
Troubleshooting Cloud Decorations
Why Are My Clouds Melting or Collapsing?
If your cake clouds aren’t holding their shape, several factors could be at play. For whipped cream or buttercream clouds, temperature is a critical consideration. Warm environments can cause them to melt quickly, so always work in a cool space and refrigerate the cake until serving.
Fondant clouds may collapse if the material is too soft or humid. To prevent this, use cornstarch or powdered sugar to firm up the fondant and allow each piece to dry thoroughly before placing it on the cake.
Common Fondant Cloud Mistakes
Fondant clouds are prone to cracking or uneven shapes if not handled correctly. Avoid over-kneading the fondant, as this can dry it out. If you notice cracks, smooth them with a bit of shortening or water. Uneven shaping can be corrected by using consistent tools like cutters or molds.
Ensuring Long-Lasting Decorative Clouds
For stable and long-lasting decorations, consider using materials like pastillage or isomalt, which harden as they dry. These options are perfect for display cakes or events where durability is essential. Always store your cake in a cool, dry place to maintain the integrity of the clouds.
For more tips on decorating cakes flawlessly, explore this step-by-step guide to cake designs.
Tips for Enhancing Realism in Cake Clouds
Adding Shadows and Highlights
Realistic clouds on cakes come to life with subtle shadows and highlights. Use a fine brush and edible food coloring to lightly shade the edges of your fondant or buttercream clouds. Soft blues, grays, or even silver shimmer can add depth and make your clouds look more lifelike.
Color Blending for a Realistic Look
Blending colors can elevate your cloud designs significantly. Start with a white base and gradually add small amounts of light blue or lavender to create a soft gradient. This technique works exceptionally well when using airbrushing or stenciling to decorate the cake’s surface.
Texture Tips for Fluffy Clouds
To mimic the texture of real clouds, try layering different materials. For example, pipe whipped cream in varying heights and swirl patterns to add dimension. If you’re using fondant, create a fluffy effect by rolling it unevenly or adding small mounds on top of larger ones. Texturing tools, such as ball tools or toothpicks, can help add realistic details.

By combining these techniques, you can create clouds that truly impress. Curious to try out more designs? Check out additional ideas for decorating cakes in creative ways!
Frequently Asked Questions About Cake Clouds
Can I Make Clouds Ahead of Time?
Yes, you can prepare cake clouds in advance, but the method depends on the materials you use. For fondant clouds, shape them several days before decorating and store them in an airtight container at room temperature to prevent them from drying out excessively. Whipped cream clouds, however, are best made just before serving, as they tend to deflate or melt quickly in warm conditions.
If you’re using cotton candy for decorative clouds, wait until the last moment to place them on the cake. Exposure to humidity can cause cotton candy to dissolve. By planning ahead, you can ensure your clouds look fresh and beautiful.
What’s the Best Method for Beginners?
If you’re new to decorating and wondering how do you make clouds for a cake, start with buttercream or fondant. Buttercream is easy to pipe and doesn’t require specialized tools, making it ideal for beginners. For those ready to explore fondant, simple cloud-shaped cutters are a great way to create clean, professional-looking clouds without much effort.
How Do I Store Edible and Non-Edible Clouds?
Proper storage is essential for maintaining your cloud decorations. Edible clouds made of whipped cream or buttercream should be refrigerated until serving. For fondant or pastillage clouds, store them in a cool, dry place away from direct sunlight. Non-edible clouds, like those made from cotton candy or rice paper, should be kept in airtight containers to avoid moisture exposure.
For more tips and tricks, explore this guide to creating stunning cake decorations.
Expert Recommendations and Additional Resources
Advice from Professional Cake Decorators
Experienced decorators recommend starting small and practicing techniques to build confidence. For intricate designs, patience and the right tools are key. Use a mix of edible and non-edible materials to achieve both beauty and practicality.
Online Tutorials and Video Guides
Learning how to make clouds for a cake is easier with visual aids. Many online platforms offer step-by-step tutorials that cater to beginners and professionals alike. From fondant shaping to airbrushing techniques, there’s a wealth of resources to help you master the craft.
Recommended Tools and Brands for Cloud Making
Invest in high-quality tools, such as sturdy fondant cutters and precision brushes, to enhance your creations. Trusted brands for edible decorations include Wilton, Ateco, and Renshaw. These products ensure your designs are as durable as they are stunning.
Now that you have expert tips and resources, it’s time to start decorating your cake with beautiful clouds!

